Pages

Tuesday, April 2, 2013

Sewing my Wedding Dress: the Bodice


First of all, thank you for all of your sweet comments about my dress and wedding. It is really sweet. If I'm ever feeling sad, I can read all of those comments to make me smile!

Recaps:
Wedding Dress Inspiration & Muslins
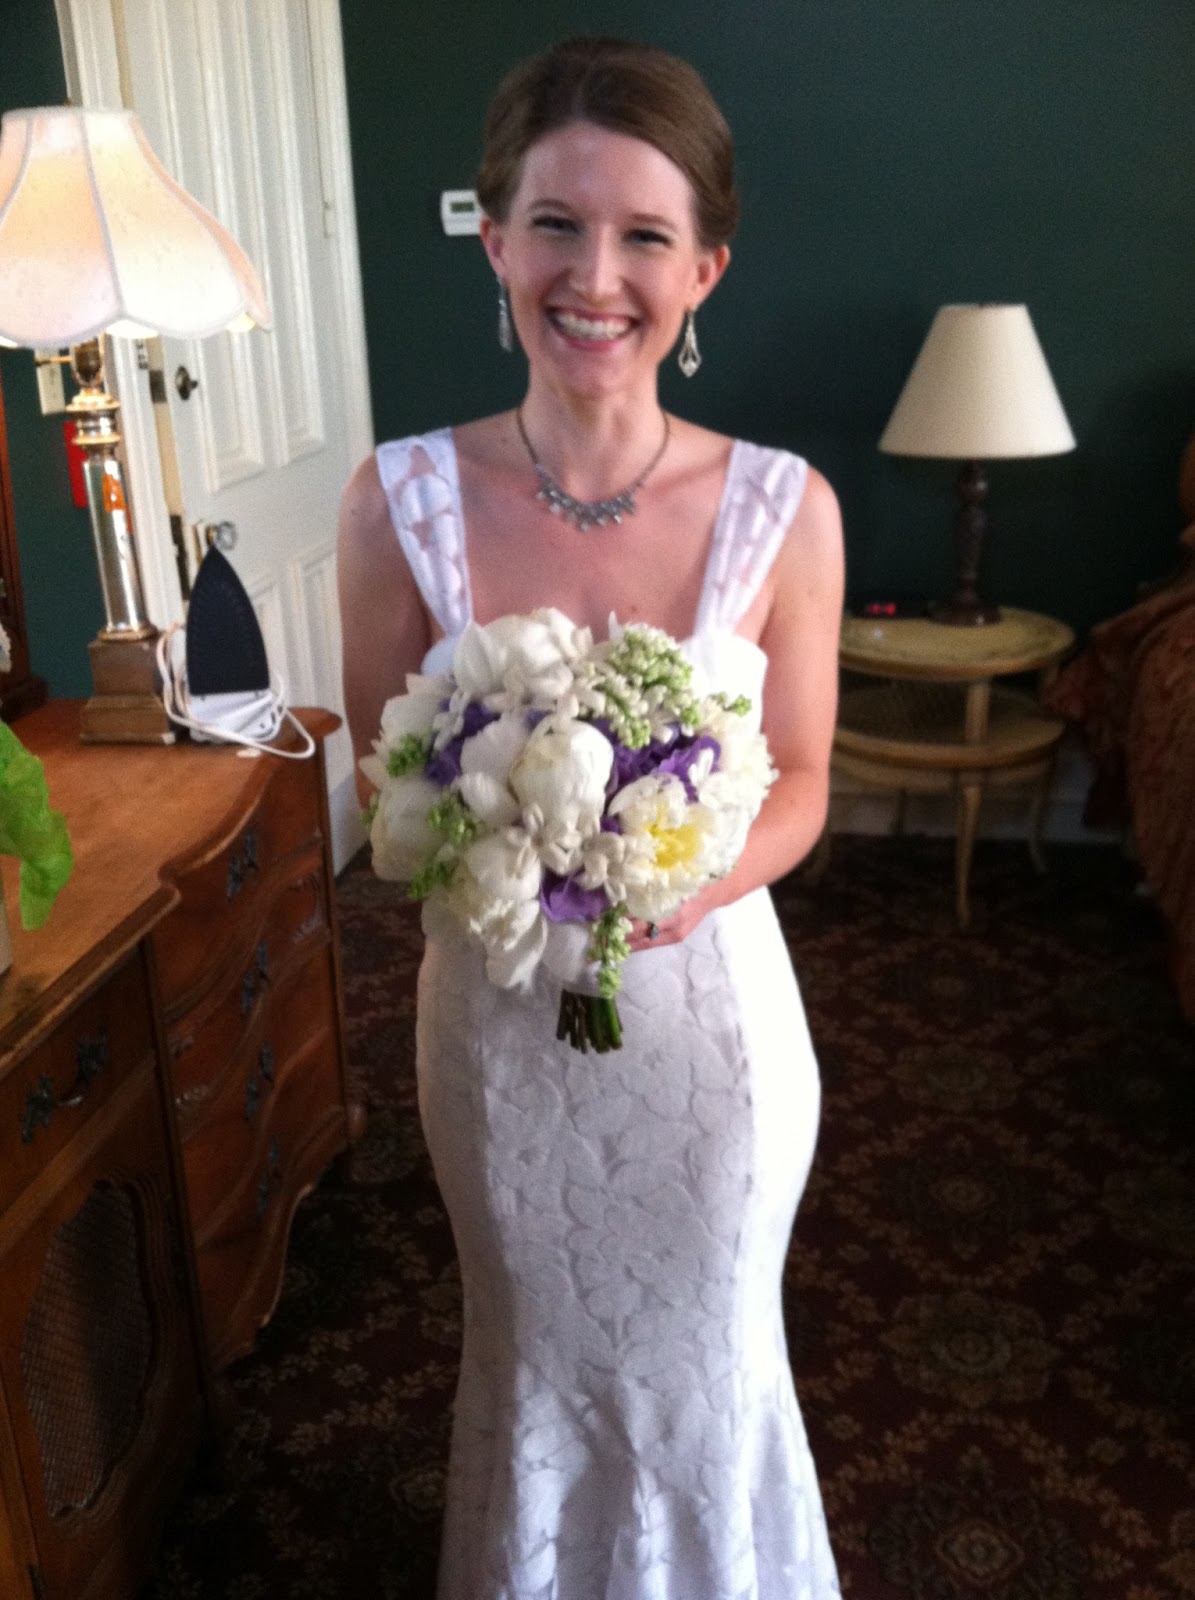
Pictures of my Finished Dress

I did not do a very thorough job of documenting my sewing of the dress. Most of my "in-progress" pictures are awful selfie cell phone pics that I text-ed to my mom so she could see my progress.

I made the first muslin of the bodice at the end of October 2012. Click on the link for the original post with my sketches and the muslin muslin. The pattern used (for parts) is McCall's 5321 for a strapless wedding dress with a giant poof skirt. I bought it on sale for 99 cents to use the bodice pieces only, as I wanted princess seams and had my own ideas for the straps and back. I drafted a rough idea of the back and straps myself and knew that would be adjusted later depending on the lace.

Making muslin 2 out of a sheer fabric gave me some more time to see what I needed to adjust. It helped me realize I did not want the point at the waist and instead just made it straight across, which is easier too. I also noted that the bodice neckline was too high, especially under the armpits, so I adjusted all of that. That was in November.
                                                     
Then I procrastinated through January and then worked on my skirt. Finally, towards the end of February (and yes, the wedding was March 10) I got it together and sewed up the bodice.

The bodice has five layers of fabric: lace, silk charmeuse underlining, two layers of muslin to give support and encase the bra pads, and a china silk lining on the inside. So the front is three layers, bra pads in the middle and the muslin/lining is third layer. While there is a waist seam, the layers are joined individually. This turned out to be very wise as I was very displeased with the first set of bra pads. They looked very fake and awkward and creepy. Of course, no pictures, but take my word for it.
In progress, with the pads I later removed.
 The dress was at this point (below) when I finally made up my mind to remove and replace them. I monkeyed my way up between the layers and ripped them out and put in different padding. These were the cut up bras that worked so well for the muslin. The second, while different, also looked like shit. After getting cranky and angry, I was stumped for a while and then I tried the separate ones from Jo-Ann that had never looked right in any other dress and of course, they worked. I pinned them in and sewed them down very last after the zipper and hem and straps were complete, to make sure they were positioned correctly..
Straps are pinned and not yet hemmed. 
 While pinning it and trying it on, I realized that when all four edges of the back/strap piece were sewn down, there was no way to get into my dress. The narrow part at the knees makes it impossible to pull over your head; not that you want to do that anyways after you have paid someone to do your hair...

 In the end, I added hooks and eyes to close the right side under my arm. Since I am right handed, I could hook it myself, and that gave me enough leeway to slip it over my hair.
 Originally, I had meant for the pads to only be sewn to the muslin, and thus, be invisible. After all the drama with three sets of pads, I just whip-stitched them the the lining. It is still seamless on the outside. Plus, this was literally days before we left for New Orleans...
Hooks and eyes to hold it shut.
 I handpicked the zipper and while it is not quite perfect (like all of my sewing) it is fine and didn't pull apart and show while the dress is on. There is also a hook at the top, but there's not enough stress on it to make it want to unzip itself.
 As for the straps and the back piece, I had originally thought about trimming it with scallops. I made a version with them, but the scallops are too big and it looked ridiculous. I tried another version and ended up destroying it by trying to do a narrow hem. Hint: it looked awful. I had purchased some tulle for the skirt and I ended up not needing it, so I basically sandwiched the lace and tulle, sewed it, trimmed the edges, turned it right-side out and then top-stitched it, so it didn't immediately fall apart. While that is probably not "best," it was barely noticeable.

The straps are top-stitched to the bodice. I am a lazy hand-sewer and I didn't want any wardrobe malfunctions at my wedding. It's hardly visible to me, and I made it, so I am guessing no one else would even notice. Except perhaps for you ladies. 

I will leave you with two real life pictures:
                                 
and if you read all that, thanks for reading! :)

Friday, March 29, 2013

My Wedding Dress

Officially married!

If you missed the first post, it has all the inspiration and background leading up to my final dress idea. This post is only pictures; later in the week I will post about constructing the bodice and the skirt in two separate posts. 

Let me say first, it was a beautiful wedding. The weather was sunny and 75, most of our family and friends could make it to New Orleans and it was just an absolutely wonderful day! I am so glad that I made my own dress, making the day even more meaningful to me. I love my dress and it turned into exactly what I wanted, even though I didn't know that in the beginning. :)

Thank you to everyone who cameto the wedding, and THANK YOU to all my sewing blog friends who helped encourage me through the (sometimes rage-filled) process of making it! XOXO, Molly


My beautiful bouquet, they were able to get peonies after all!


I was standing funny, looking at my shoe.

I hemmed it with scallops.


The back from straight on, before we did our "first dance."
My dad walking me down the aisle.

Me & my mommy
The cake was both beautiful and delicious.

More information to come, but I just wanted to show off my masterpiece!

Tuesday, March 26, 2013

Wedding Dress Inspiration

Alright ladies, I am on Spring Break from school this week and only working a bit at the restaurant, so I will have time to finally post about my wedding dress. It will be in four posts: this one is inspiration and links to all my trails and tribulations beforehand, the second will just be pictures of the dress, three will be about constructing and sewing the bodice, and four will be about constructing and sewing the skirt. Therefore, the people who don't want too many details can just tune in to post 2. 

History of posts leading to my final inspiration/idea:


If you read my blog regualarly, then you have probably seen all of those and are up to date. Basically, the bodice I thought I wanted sucked and I made a different one that I like. Same for the skirt. Copying that vintage pattern for the skirt turned into a nightmare and I quit. Then I changed direction and made a skirt I loved in a matter of days. 

So my "vintage inspired" wedding dress turned into a very modern dress. I guess I didn't know what I wanted when I started, because I absolutely love my final dress and it looked awesome. Bam!

Here are my inspiration pictures torn out of Brides magazines:
For bodice lace ideas

More bodice lace ideas, for the back and shoulders.

Skirt shaping.

For the hair. I actually lost this picture, but the hairstylist dd a great job and looked a lot like this.

Anyways, soon I will post some pictures of my dress! I bet you can sort of picture it now...

March Giveaway Winner!

T-Rex would like to present this month's winner:
 Carmen! Carmen, please email me your mailing address so I can send off the patterns! (mollysewsblog at gmail [.] com)

TT is now almost 7 and he has just learned to "pretty sit" on his back legs in the last 6 months or so. It is so cute! Now he just does it to show off. When I bought him, the breeder said they sometimes do that, but he hasn't until now. Old dogs can learn new tricks!

Bloglovin

Follow my blog with Bloglovin


Saturday, March 23, 2013

Estate sale loot: New, old irons

**Don't forget to enter the March giveaway by midnight if you want to win some patterns!**


I went to two estate sales this morning. One was a waste of time, but the other was interesting. It was near Cicero and Belmont, which isn't too far away. I went because it was the first sale of two for two sisters who owned a two-flat together  Each had her own apartment, they never married and collected sooo many knick-knacks and dolls. OMG. But they both also loved to sew, so there will be a second sale in a few weeks with all of the sewing stuff and more. 

Anyways, I don't want freaky dolls or dust collecting figurines. However, in the last room I found three old irons, two of which look new and were still in their boxes. Since everything was 50% off, I bought all three for $17. 

Then I took them home to see if they worked. The first one was obviously well-used and got a newer cord at some point. It works and is nicely heavy with a smooth plate. Not that horrible non-stick plate on my modern iron that is melting off every time someone accidentally uses setting 6. It has temp settings on a thumb wheel 
 The second was a GE travel irons, new in its box. It has its warranty card, a travel pouch and a detachable cord that you can unplug from the base and then the handle folds down. Kinda cool. It works as well and the box says it weighs two pounds. I think that is going on Etsy.

Warranty card.

Box info
 This one is the same as the first iron, but brand new in its box. One and Three are both Sunbeam Ironmasters. Very nice. It works really well. Both Luke and Andrew seem to think I am hell-bent on burning down the house, but people successfully used irons with no auto-shutoff for many years. And not all of those people died in house fires. The cord is brand new and not frayed at all.


Anyways, it was fun to find some sewing related stuff after a long gap of wasted drives to crappy sales. Yay!

Friday, March 22, 2013

Pottery Class II: My Wonky Bowls

I took a five week class at Lillstreet, which is conveniently close-by. It was really fun trying (and failing) to make things on the wheel! I am going to take a ten week class starting in two weeks, and this time I won't be stressed with wedding stuff. Hopefully, I will have lots of time to go into the studio and practice outside of class (you get open studio time with your class fee!). 

Here are the other lopsided things I made, but on to my bowls! The pictures do not show them to scale, as the largest is maybe 5 inches in diameter. They are less than functional for eating, unless you want a tiny bowl of peanuts, or maybe 5 chips...

 My final two glazed in teal.
Haven't mastered a smooth inside...

The side view shows their non-symmetry.
 The black one was my first, the blue my second and the yellow my third.
 By #2, I learned to level the top and by #3 I was able to make it slightly thinner. They are still absurdly thick though.
 I gave the others away to Andrew and Luke to use for change and stuff, but I kept my yellow salt glazed one. Now I keep my pins in it!
I like how the stoneware shows through a little and makes it look "antiquey."
Anyways, just wanted to share and hopefully I will come out of my next class with some awesome stuff. Ironically, we now have matching dishes for the first time ever (from wedding presents), but T-Rex could use some fancy bowls and Andrew said I should make a tiny hand giving the finger to store my rings on at night. Lol.